Topic: How to add and manage pages
Description: Learn how to add and manage publishing pages including how to add content to your page and delete pages
Related Image:
Table of contents:
1.How to add a new page
2.How to edit a page
3.How to add content to your page
4.How to delete a page
5.How to view and manage all pages
1.1. Navigate to the site you wish to add a new page to
Within a publishing site, you have the ability to create multiple pages within the one site. Use these pages to display content and webparts related to a specific topic
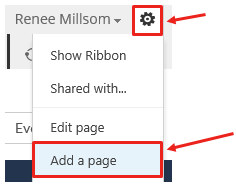
1.2. Click on the Settings wheel > Add a Page
Located in the top RH corner click on the ‘Settings wheel’ and then ‘Add a page’
1.3. Give your page a name
Select a name for your page.

1.4. Click ‘Create’
Any spaces within your page name will be replaced with ‘-‘

Upon creation you will be taken straight to the edit mode of your new page.
The default page layout of your site will be selected, refer to the ‘Page’ tab and then ‘Page Layout’ to change your page layout.
(For detailed instructions on page layouts please refer to training document ‘How to change and utilise page layouts’)
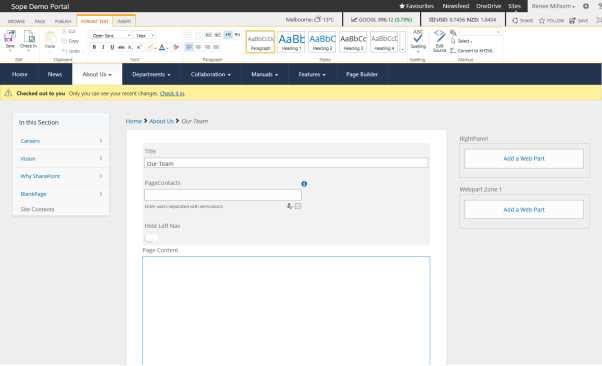
1.5. Start adding content to your page
Add content and/or webparts to your page (Refer to section 2 for more info)
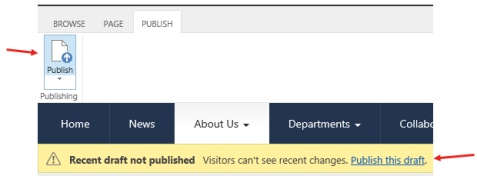
1.6. Save, Check in or Publish your page
Now that you have created your page and started to add content and/or webparts you can now ‘Save’, ‘Check in’ or ‘Publish’ your changes.
If you wish to preview your changes first then select ‘Save’ or ‘Check in’ to ensure your changes are not visible to general users
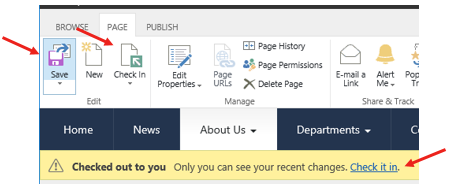
‘Publish’ your page once confirmed so general users can see your changes
2.1. Navigate to the page
If you wish to edit an existing page first navigate to that page
2.2. Click on the Settings Wheel > Edit Page
Located in the top RH corner click on the ‘Settings wheel’ and then ‘Edit Page’
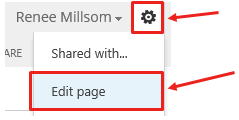
Upon editing you will be taken straight to the edit mode of your existing page.
Refer to the ‘Page’ tab and then ‘Page Layout’ to change your page layout.
(For detailed instructions on page layouts please refer to training document ‘How to change and utilise page layouts’)
2.3. Update content on your page
Update content and/or webparts to your page
2.4. Save, Check in or Publish your page
Now that you have created your page and started to add content and/or webparts you can now ‘Save’, ‘Check in’ or ‘Publish’ your changes.
If you wish to preview your changes first then select ‘Save’ or ‘Check in’ to ensure your changes are not visible to general users

‘Publish’ your page once confirmed so general users can see your changes

Follow steps 2.1 and 2.2 to edit your page
Place your cursor in the ‘Page Content’ section of your page
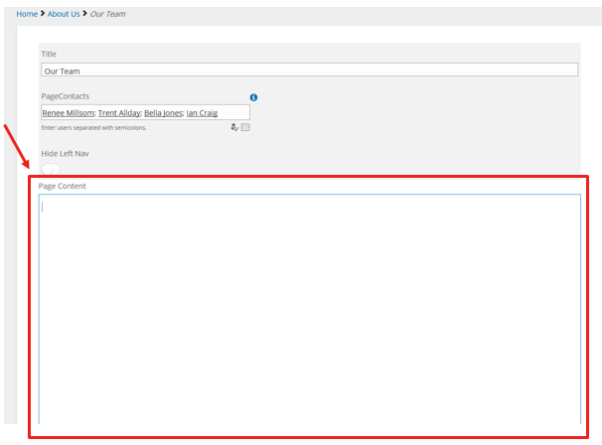
3.1. ‘Format Text’ tab
Within the ‘Page Content’ a ‘Format Text’ editor will appear in the top ribbon.

Here you can do things like:
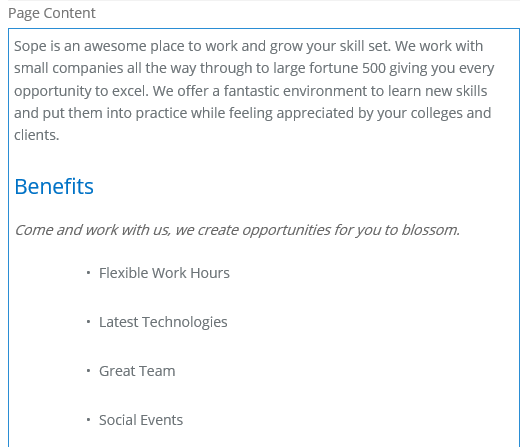
• Formatting text (bold, underline, italics, colours, sizes, text alignment etc)
• Bullets and Numbering
• Apply heading styles
• Edit in HTML
Example Formatting
3.2. ‘Insert’ tab
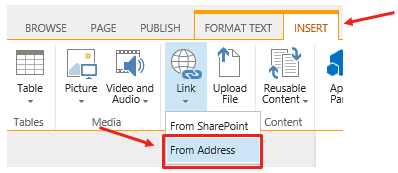
Within the ‘Page Content’ use the ‘Insert’ tab within the top ribbon

Here you can insert things like:
• Table
• Picture (from Computer, SharePoint or Address)
• Video and Audio (from Computer, Embed, SharePoint or Address)
• Link (from SharePoint or Address)
• Reusable content
• WebPart
• 
 Embed Code
Once you have inserted an item you will notice a new tab appear in the ribbon to help configure your item
3.3. Insert Table
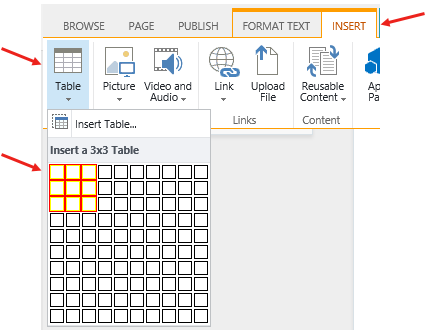
Note two new tabs appear for ‘Table Layout’

Here you can do the following to your table:
• Merge and Split Cells
• Insert rows
• Delete rows, columns or entire table
• Adjust table width and height
• Adjust column and row width and height
‘Design’ tab

Here you can do the follow to your table:
• Add Header and Footer rows
• Specify First and Last columns
• Update Style (default table styles including a clear option)
• Show grid lines
Default Table Style - Light

Table Style 2 - Light banded

Table Style 7 - Accent 2

3.4. Insert Picture
Insert Picture From Computer
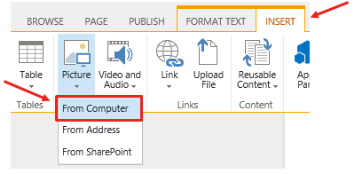
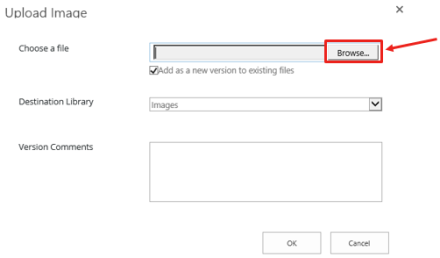
Browse for file from your desktop or local/shared drive
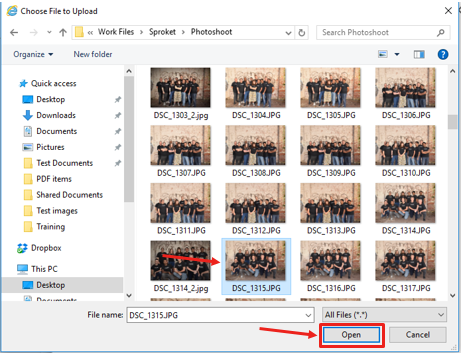
Select Image from and either double click or click on ‘Open’
Click ‘OK’
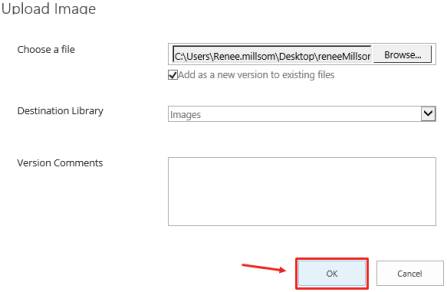
Provide any supporting meta data to your image, or simply click ‘Save’

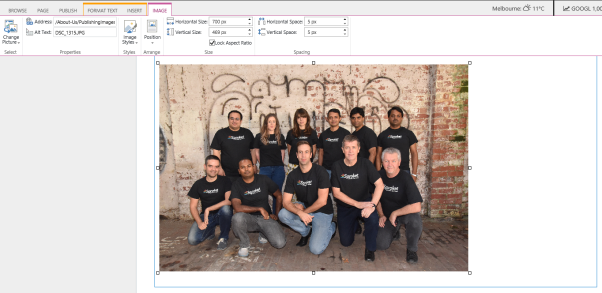
Image will be inserted to your ‘Page Content’
Insert Picture From SharePoint
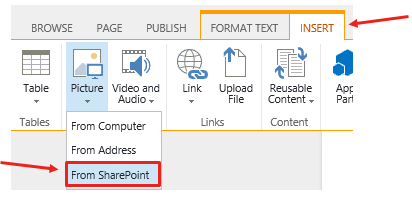
Browse for a file that already exists in SharePoint
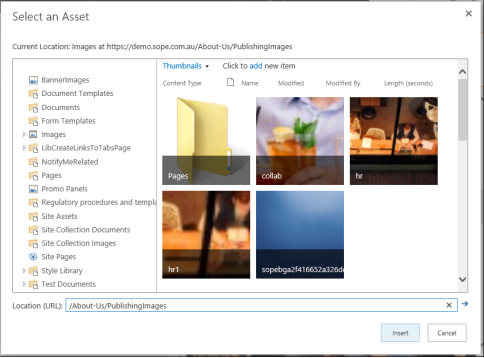
Use the LH navigation to navigate your relevant site and library location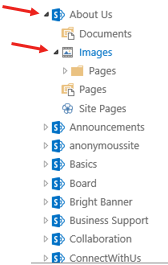
Select image and click on ‘Insert’
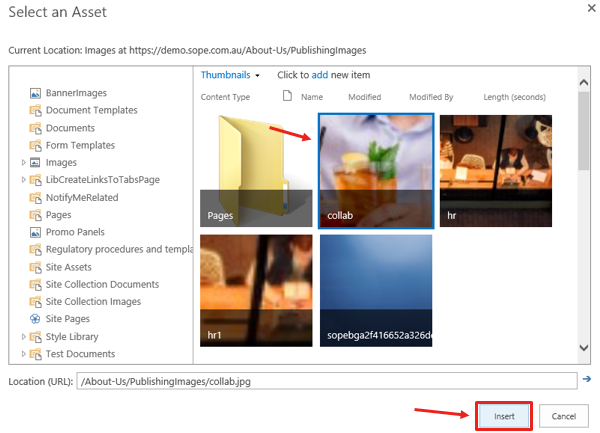
Image will be inserted to your ‘Page Content’

Note the new tab for ‘Image’ appears in the top ribbon

Here you can do things to your image such as:
• Change picture
• Image styles
• Position
• Horizontal and Vertical sizing and spacing
3.5. Insert Link
Insert Hyperlink From Address
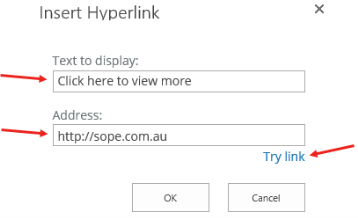
Insert the ‘Text to display’ and relevant ‘Address’
Note: Use the ‘Try link’ feature to test that your link works
Link inserted to your ‘Page Content’
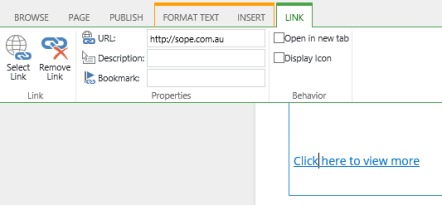
Note the new tab for ‘Link’ appears in the top ribbon

Here you can do things to your link such as:
• Remove Link
• Update URL
• Open in new tab
• Display Icon
3.6. Insert Youtube video
Insert a Youtube embed code to your page
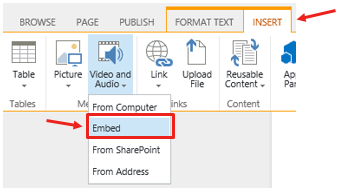
or

Navigate to your Youtube video and click on ‘Share’
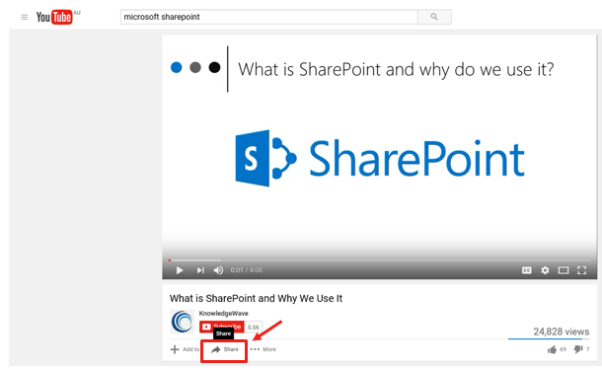
Click on ‘Embed’

Ctrl + C or right click > copy the embed code
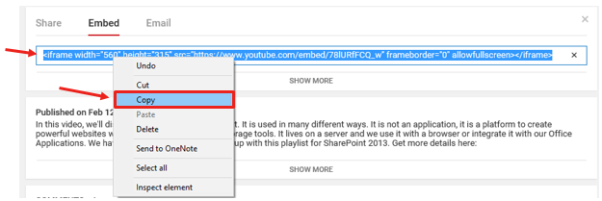
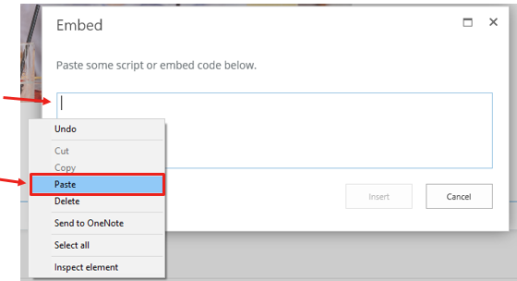
Ctrl + V or right click > paste into your embed code section in your page
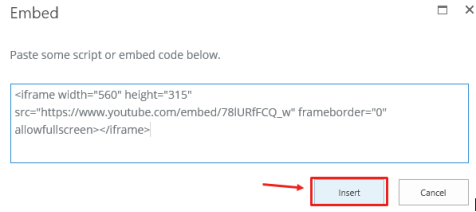
Click ‘Insert’
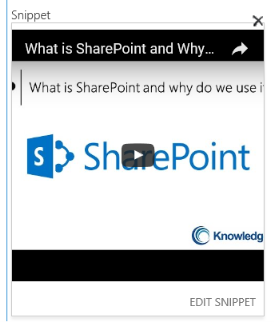
Youtube video will be added to your ‘Page Content’
3.7. Save, Check in or Publish your page
Now that you have created your page and started to add content and/or webparts you can now ‘Save’, ‘Check in’ or ‘Publish’ your changes.
If you wish to preview your changes first then select ‘Save’ or ‘Check in’ to ensure your changes are not visible to general users

‘Publish’ your page once confirmed so general users can see your changes
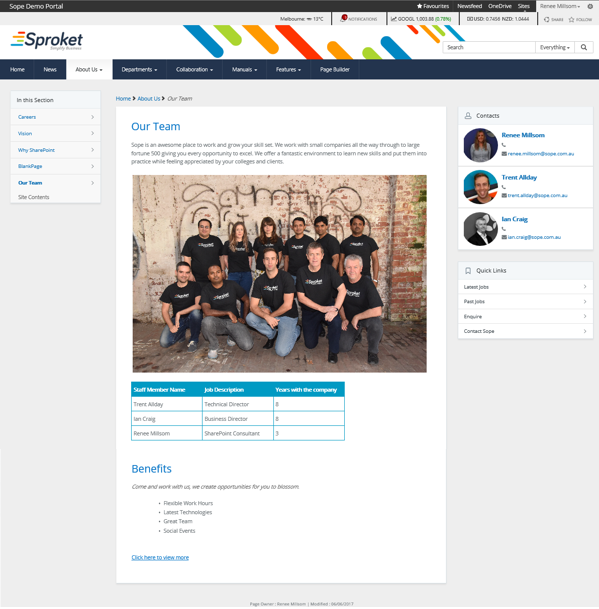
3.8. View your page
4.1. Navigate to the page
If you wish to delete an existing page first navigate to that page
4.2. Click on the Settings Wheel > Edit Page
Located in the top RH corner click on the ‘Settings wheel’ and then ‘Edit Page’

Upon editing you will be taken straight to the edit mode of your existing page.
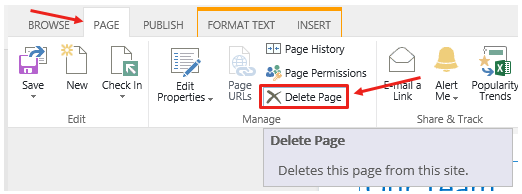
4.3. Navigate to the ‘Page’ tab and then ‘Delete Page’
Click on the ‘Page’ tab located in the top ribbon and then click on ‘Delete Page’
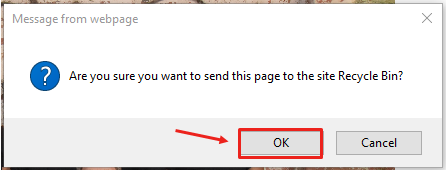
4.4. Click ‘OK’
To manage an individual page generally you navigate to that specific page.
If you would like to view all pages within your current site follow these steps
5.1. Navigate to your site
Navigate to the site your pages are located
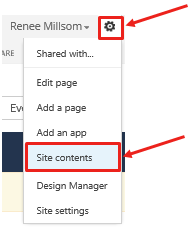
5.2. Click on the Settings wheel > Site Contents
Located in the top RH corner click on the ‘Settings wheel’ and then ‘Site contents’
5.3. Click on ‘Pages’

5.4. View all existing pages for this site
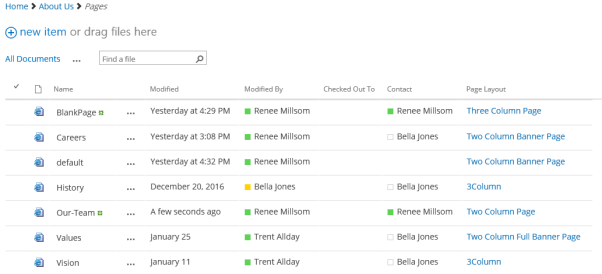
Here you will find a list of all publishing pages that live within the site. View information such as:
• Name
• Modified Date
• Modified By
• Checked Out To
• Contact
• Page Layout
5.5. Use the ribbon to manage your pages
Use the ‘Files’ tab to manage individua l pages

Select your page by clicking on the tick next to your page
 Once selected, utilise things like:
• View Properties
• Edit Properties
• Check Out, Check in, Discard Check Out
• Version History
• Shared With
• Delete Document
• Alerts
Use the ‘Library’ tab to update general

Features included:
• Quick Edit (excel spreadsheet type mode)
• Create and Modify views
• Alerts
• Connect to outlook
• Export to excel
• Open with explorer
• Library Settings
• Shared With
• Workflows
5.6. Add new page from ‘Pages’ library
You can also add a new page whilst in the ‘Pages’ library
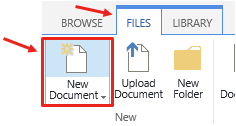
Navigate to the ‘Files’ tab and click on ‘New Document’
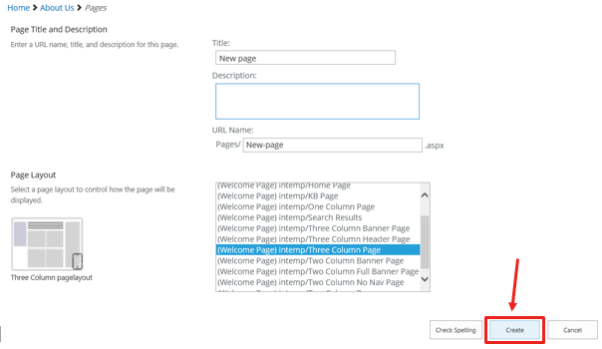
Provide the following for your page
Title

Description (optional)

URL Name (this will default to your Page Title and will replace blank spaces with ‘-‘)

Page Layout (select which Sproket page layout you would like to use)

Click ‘Create’
New page will be created but will only be visible to you (note the Checked Out To is your name)

Click on your page ‘Name’ to navigate to the page to begin editing