Topic: How to add Sproket and standard SharePoint webparts to a page
Description: Learn how to add Sproket related webparts to a page as well as standard SharePoint webparts
Related Image:
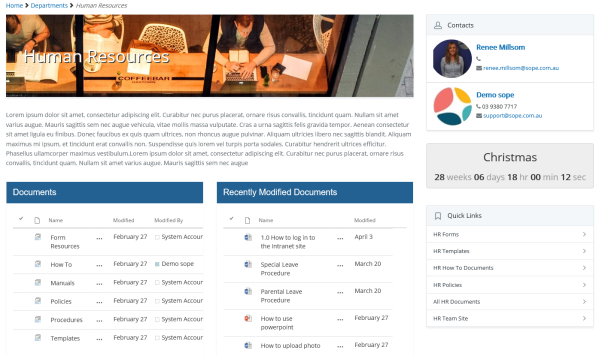
Table of contents:
1.How to add Sproket webparts to your page
2.How to add standard SharePoint webparts to your page
1.1. Navigate to your relevant page
Navigate to an existing page or a newly created blank page you wish to add webparts and content to
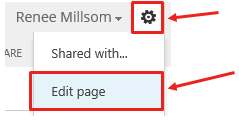
1.2. Click on the Settings Wheel > Edit Page
Located in the top RH corner click on the ‘Settings wheel’ and then ‘Edit Page’
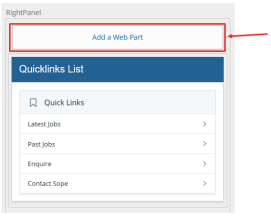
1.3. Click on ‘Add a Web Part’
Within the ‘edit mode’ of your page you will see ‘web part zones’ throughout your chosen page layout
Ie Top Panel, Left, Right etc

Select the relevant zone you would like to insert a Sproket webpart to on the page
Upon clicking on ‘add a web part’ a panel will appear below the ribbon at the top of the page
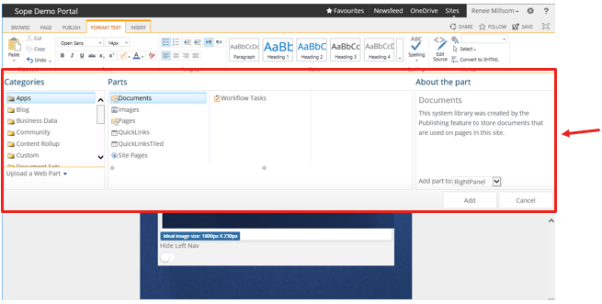
1.4. Click on ‘Sproket’ within the ‘Categories’ column
Scroll down within the first column ‘Categories’ until you find ‘Sproket
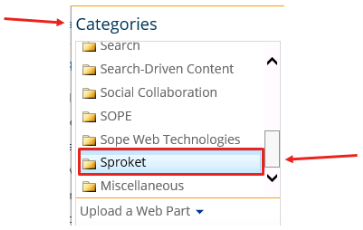
1.5. Here you will find a gallery of Sproket related webparts
Once you have seleted ‘Sproket’ you will then be presented with a list of webparts related to the Sproket product.

This list includes webparts such as:
• Banner Images (scrolling banner)
• Blogs (news webpart)
• Contact Search
• Countdown
• FAQ (collapsible accordion webpart)
• Featured News Banner
• My Account
• My Tasks
• Promo Panels
• Publishing Page Contacts
• Quicklinks (List and Tiles)
• Weather
• What’s Up
This list will continue to grow based on the future releases and enhancements to Sproket
Add these Sproket webparts to your page for an optimised user experience
1.6. Click ‘Add’
Click on ‘Add’ to add the webpart into your relevant webpart zone (use the drop down where it says ‘add part to’ if you wish to change the selected zone)
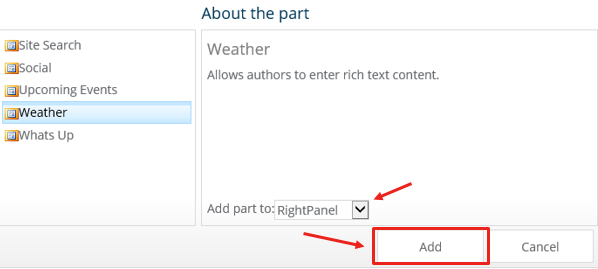
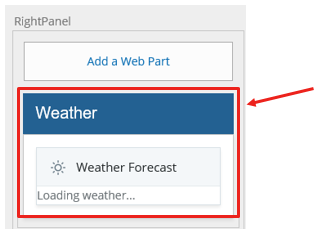
Your web part has now been added to the page in your selected zone
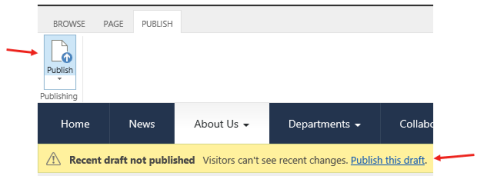
1.7. Save, Check in or Publish your page
Now that you have added the ‘Weather’ webpart to your page you can now ‘Save’, ‘Check in’ or ‘Publish’ your changes.
If you wish to preview your changes first then select ‘Save’ or ‘Check in’ to ensure your changes are not visible to general users
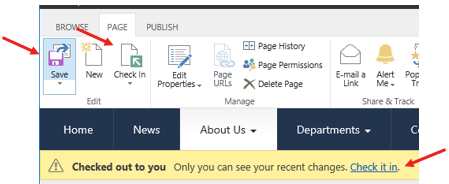
‘Publish’ your page once confirmed so general users can see your changes
2.1. Navigate to your relevant page
Navigate to an existing page or a newly created blank page you wish to add webparts and content to
2.2. Click on the Settings Wheel > Edit Page
Located in the top RH corner click on the ‘Settings wheel’ and then ‘Edit Page’

2.3. Click on ‘Add a Web Part’
Within the ‘edit mode’ of your page you will see ‘web part zones’ throughout your chosen page layout
Ie Top Panel, Left, Right etc

Select the relevant zone you would like to insert a standard webpart to on the page

Upon clicking on ‘add a web part’ a panel will appear below the ribbon at the top of the page


2.4. Click on ‘Apps’ within the ‘Categories’ column
Select the first option ‘Apps’ within the ‘Categories’ column
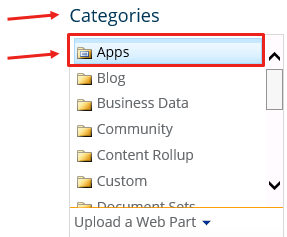
2.5. Here you will find the relevant Lists and Libraries from the current site contents
Once you have seleted ‘Apps’ you will then be presented with a list of items related to the current site conents

This list could include things such as:
• Document Libraries
• Lists
• Pages
• Discussion Boards
• Calendars
• Tasks
• etc
This list reflects the current site contents of your site. Ie if you add a new list or library to your site, it will automatically appear in this section
Add these webparts to your page to display relevant content of your site. Display documents, list data, images, tasks, discussion boards etc
2.6. Click ‘Add’
Click on ‘Add’ to add the webpart into your relevant webpart zone (use the drop down where it says ‘add part to’ if you wish to change the selected zone)
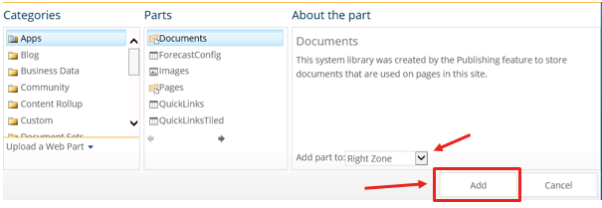
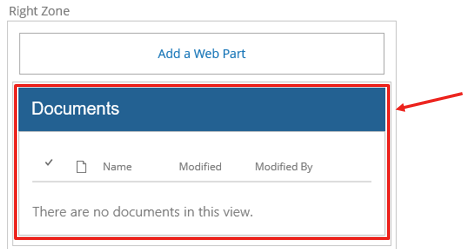
Your web part has now been added to the page in your selected zone
2.7. Save, Check in or Publish your page
Now that you have added the ‘Weather’ webpart to your page you can now ‘Save’, ‘Check in’ or ‘Publish’ your changes.
If you wish to preview your changes first then select ‘Save’ or ‘Check in’ to ensure your changes are not visible to general users

‘Publish’ your page once confirmed so general users can see your changes
