Topic: How to add and manage quicklinks (tiled)
Description: Learn how to add and manage quicklinks in the ‘tiled’ format
Related Image: Recommended icon dimensions: 32 x 32 pixels
Table of contents:
1.How to add a new quicklink
2.How to edit quicklinks
3.How to delete quicklinks
4.How to manage your quicklinks
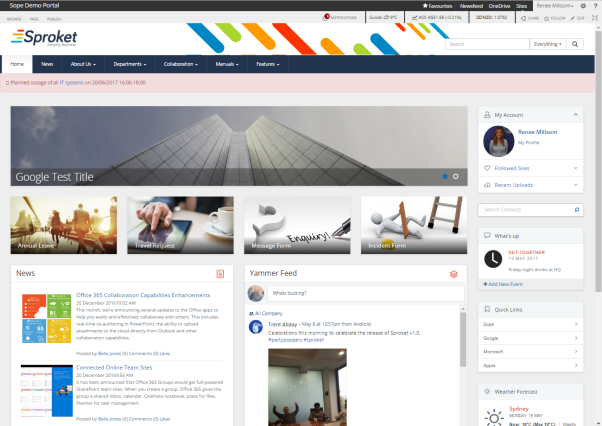
1.1. Navigate to the home page of your site or relevant subsite
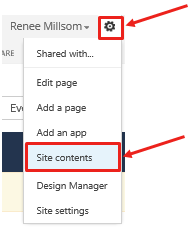
1.2. Click on the Settings wheel > Site Contents
Located in the top RH corner click on the ‘Settings wheel’ and then ‘Site contents’
1.3. Click on ‘QuickLinksTiled’
Within the site contents, select the list titled ‘QuickLinksTiled’

1.4. Click on ‘new item
Within the ‘QuickListTiled’ list click on ‘new item’ to add a new quicklink

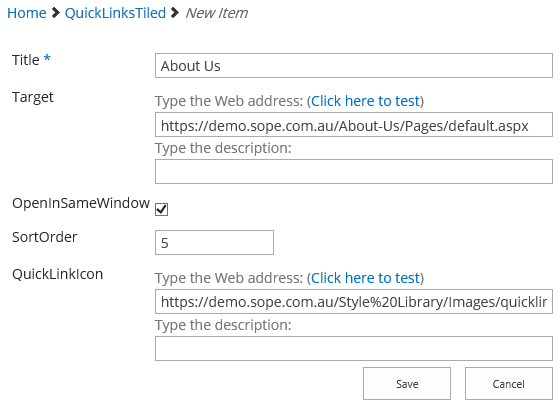
1.5. Complete the relevant meta data for your quicklink
Meta data is the associated tags or properties assigned to your quicklink.
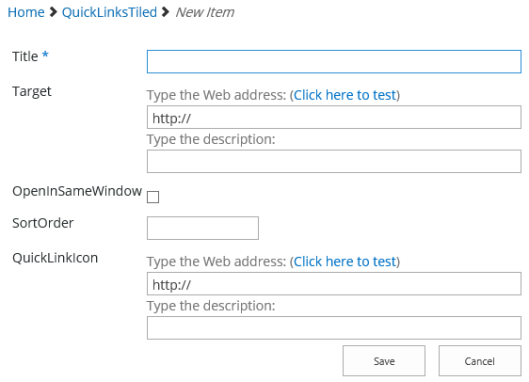
Title – Text displayed over your quicklink tile

Target – The destination URL upon clicking on the quicklink

OpenInSameWindow – Determines if the destination URL opens in the same tab

SortOrder – Determines the order in which the quicklink tile displays in the list

QuickLinkIcon – Ability to reference an icon image to add to your tile (recommended dimension 32 x 32 pixels)
Copy and paste a link to an image that exists within SharePoint or an external site. Use the ‘Click here to test’ function to ensure your link takes you to the correct image. Add a description to your image (optional)

Example Quicklink
1.6. Click on ‘Save’
Once you have completed the relevant meta data fields click on ‘Save’ located in the top LH corner or botton RH corner


1.7. View your quicklink
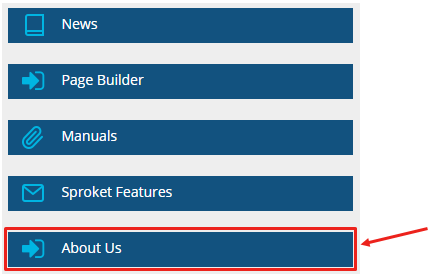
Your quicklink will be added into the ‘QuickLinksTiled’ list with the relevant meta data

If you navigate back to the home page or relevant page you will now see your new quicklink tile in the relevant order
2.1. Edit an individual quicklink
Click on the ellipsis (three dots) of your item

Click on ‘Edit Item’

This will take you back to the original meta data fields populated in section no.1
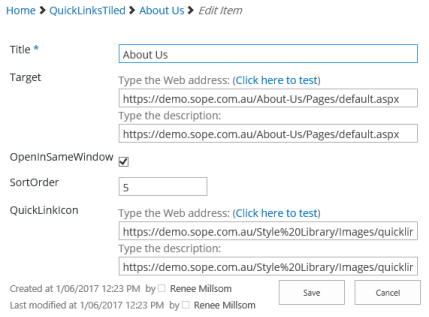
Once you have updated the relevant meta data fields click on ‘Save’ located in the top LH corner or botton RH corner


2.2. Edit multiple quicklinks
Click on ‘edit’ this list
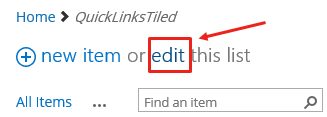
This turns your list into an excel spreadsheet type mode where you can click on the individual cells to update your meta data.

Update properties such as Title, Target, OpenInSameWindow, SortOrder and QuickLinkIcon
If you wish to copy properties from another item simply highlight the cells and either ctrl + c and ctrl + v into the new cells or drag the values down using the bottom right hand corner
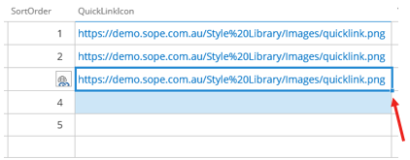
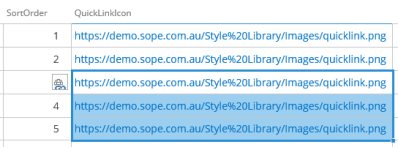
Once you are happy with your change click on ‘Stop’ editing this list

3.1. Delete an individual quicklink
Click on the ellipsis (three dots) of your item

Click on ‘Delete Item’
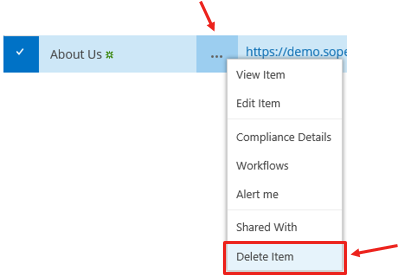
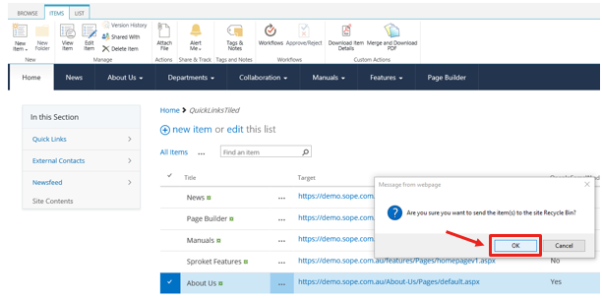
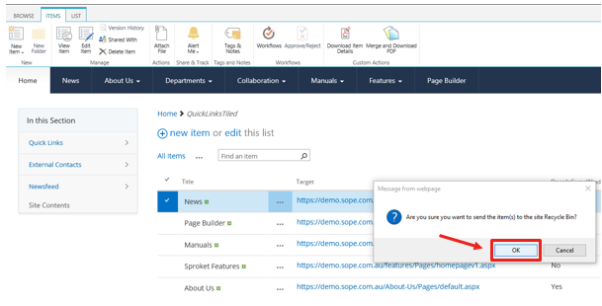
Click ‘OK’
3.2. Delete multiple quicklinks
Select your quicklinks and navigate to the ‘Items’ tab
Select the tick next to your items and navigate to the ‘Items’ tab in the ribbon.

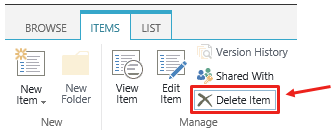
3.3. Click on ‘Delete Item’
3.4. Click on ‘OK’
Follow the same steps from 1.1 – 1.3 above to navigate to the ‘QuickLinksTiled’ list.
4.1. View your existing quicklinks
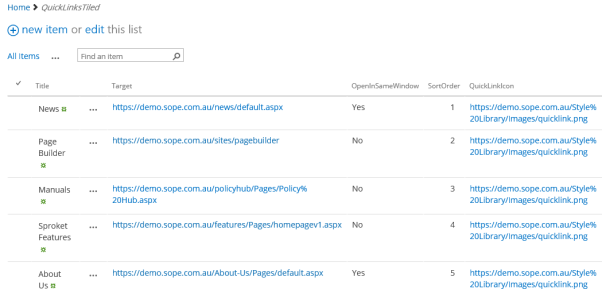
4.2. Use the ‘Ribbon’ to manage your quicklinks
The ‘Ribbon’ is located in the top LH corner and displays a ‘Items’ and ‘List’ tab.
These tabs are used to manage individual items as well as the general list settings.
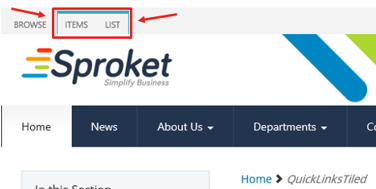
To utilise the ‘Items’ tab, select your quicklink by ticking the box next to or on the item

Within the ‘Item’ tab you can do a number of things. Some of these include:
- View Item
- Edit Item
- Delete item

Within the ‘List’ tab you can do a number of thing. Some of these include:
- Quick Edit
- Create and Modify Views
- List Settings
- Export to excel
