Topic: How to add and remove contacts on a page
Description: Learn how to add and remove contacts on a page using the contacts webpart
Related Image:
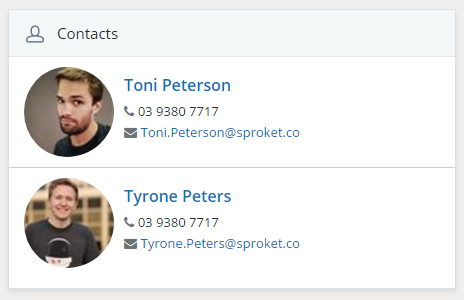
Table of contents:
1.How to add the contact webpart
2.How to add contacts to the webpart
3.How to remove contacts from a page
1.1. Navigate to the page you wish to add contacts to

1.2. Click on the Settings wheel > Edit Page
Located in the top RH corner click on the ‘Settings wheel’ and then ‘Edit Page’
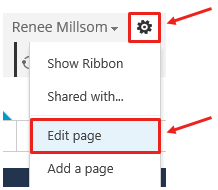
This will take you to the edit mode of your page.
1.4. Click on ‘Add a Web Part’
Within the ‘edit mode’ of your page you will see ‘web part zones’ throughout your chosen page layout
Ie Top Panel, Left, Right etc

Select the relevant zone you would like to insert your contacts to on the page
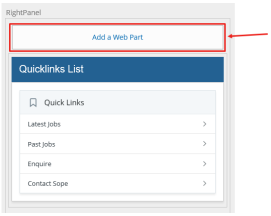
Upon clicking on ‘add a web part’ a panel will appear below the ribbon at the top of the page

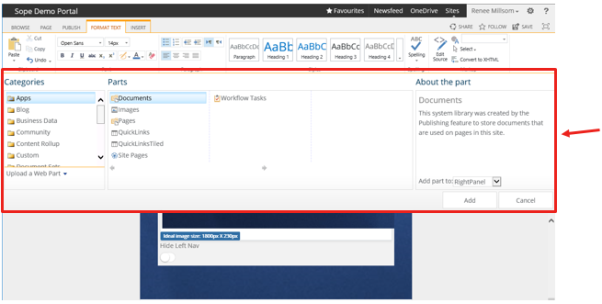
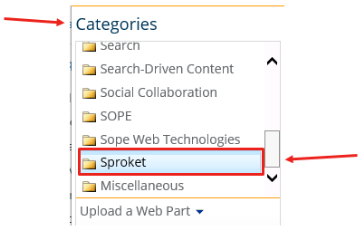
1.5. Click on ‘Sproket’ within the ‘Categories’ column
Scroll down within the first column ‘Categories’ until you find ‘Sproket
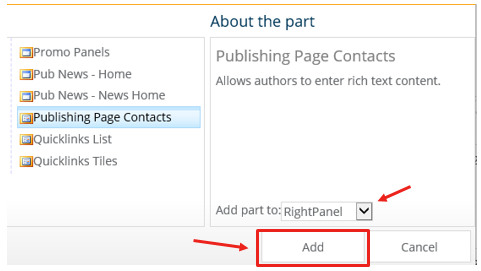
1.6. Click on ‘Publishing Page Contacts’ within the ‘Parts’ column
Once you have seleted ‘Sproket’ you will then be presented with a list of webparts related to the Sproket product.
Select ‘Publishing Page Contacts’


1.7. Click ‘Add’
Click on ‘Add’ to add the webpart into your relevant webpart zone (use the drop down where it says ‘add part to’ if you wish to change the selected zone)
Your web part has now been added to the page in your selected zone
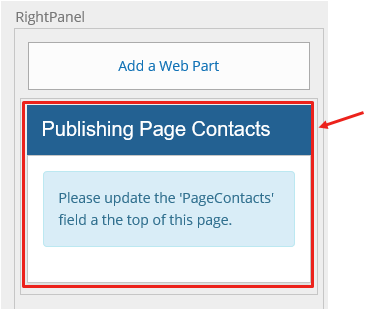
Now that you have added the ‘Publishing Page Contacts’ to your page as per the steps in section 1 you need to select which contacts you would like to display.
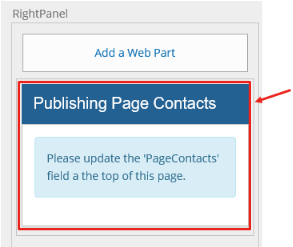
Note in your webpart there is a message that states ‘Please update the ‘PageContacts’ field at the top of this page’
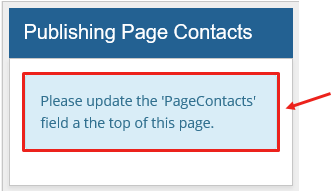
2.1. Navigate to the ‘PageContacts’ section of your page
Following the webpart message whilst in ‘edit mode’ navigate to the ‘PageContacts’ section of your page

2.2. Add in your relevant contacts
All contacts will be pulled from your central contact directory.
Type in the exact user name
ie

Click the ‘person/tick’ icon to confirm there is a user that exists with this name

Note: If the username provided does not exist you will be prompted with the following message

Alternatively, select the ‘book’ icon to browse for users in your central directory

This will prompt you to search for a specific user
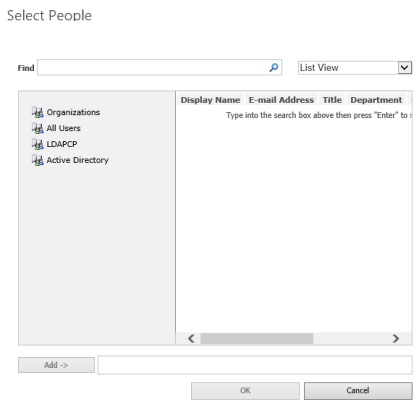
Type in their name or email address (partial values will work also) to search for the correct user
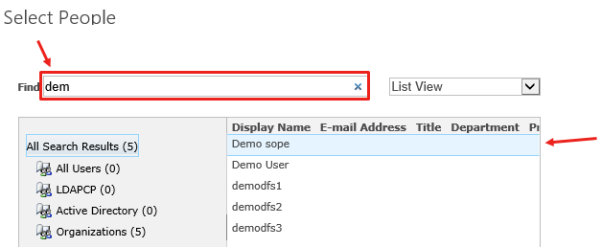
Select your user by double clicking the name or by selecting ‘Add’
(repeat this process to add multiple users)
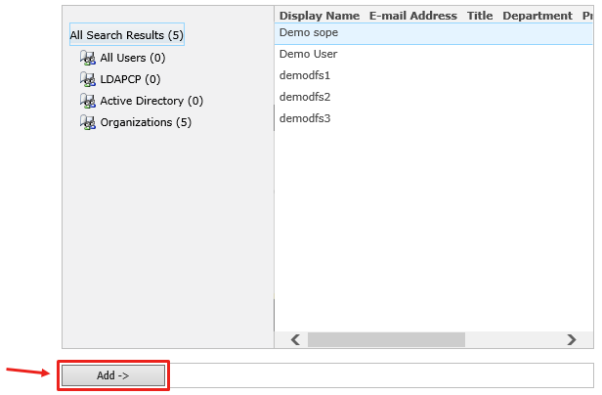
Your user will now appear in the add section. Click ‘OK’

2.3. Save, Check in or Publish your page
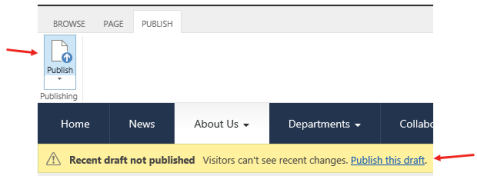
Now that you have added the ‘Publishing Page Contacts’ webpart and added a contact to the ‘PageContacts’ field in your page you can now ‘Save’, ‘Check in’ or ‘Publish’ your changes.
If you wish to preview your changes first then select ‘Save’ or ‘Check in’ to ensure your changes are not visible to general users
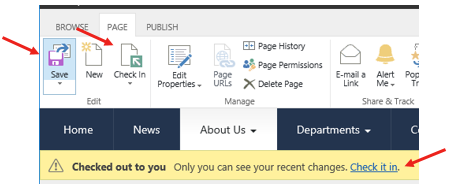
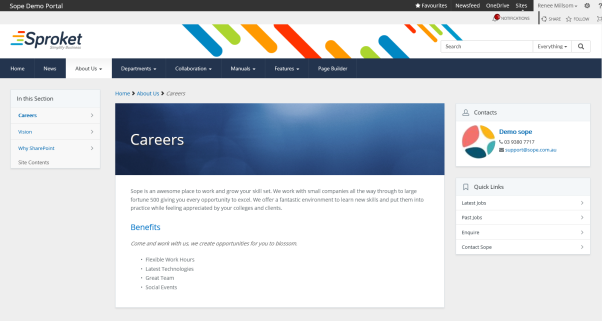
Your contact will now appear within the webpart on your page.
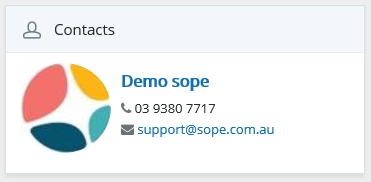
Webpart will show the following from the contact directory:
• Profile Picture
• Phone
• Email
‘Publish’ your page once confirmed so general users can see your changes
If you no longer require contacts on your page, follow steps 1.1 and 1.2 to edit your page
3.1. Remove the contacts from the ‘PageContacts’ field
Simply back space the name out of the ‘PageContacts’ field within your page
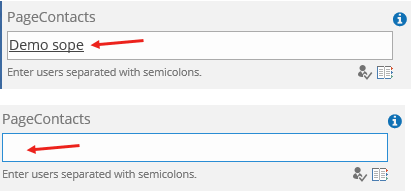
If there is no contacts in the ‘PageContacts’ field then nothing will appear in your ‘Publishing Page Contacts’ webpart
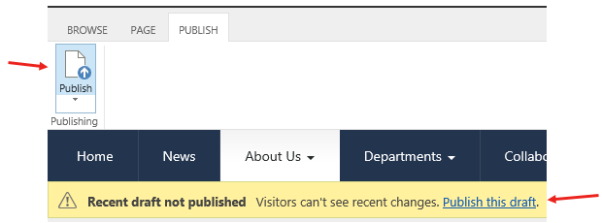
3.2. Save, Check in or Publish your page
Now that you have removed the contacts from the ‘PageContacts’ field in your page you can now ‘Save’, ‘Check in’ or ‘Publish’ your changes.
If you wish to preview your changes first then select ‘Save’ or ‘Check in’ to ensure your changes are not visible to general users

‘Publish’ your page once confirmed so general users can see your changes
3.3. Remove the ‘Publishing Page Contacts’ webpart
If you wish to remove the entire ‘Publishing Page Contacts’ webpart from the page, navigate to the webpart zone where it has been inserted
Click on the drop down arrow/tick box in the top RH corner of the webpart and then ‘Delete’
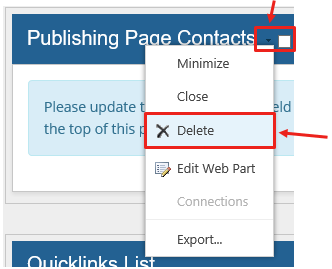
Note: You can select ‘Close’ if you wish to temporarily remove it from the page and re add it later via the ‘Closed webparts’ section
Webpart has now been removed from the page.
3.4. Follow the same steps as 3.2 to save, check in or publish your page