Topic: How to attach meta data (properties) to your documents
Description: Learn how to attach meta data (properties) to your document on the individual document, in the Quick Edit view and in Microsoft Word.
Table of contents:
1.Attaching meta data to a document during the upload process
2.Attaching Meta Data to a document via the Document Properties
3.Attaching Meta Data to an existing document
4.How to attach meta data using Quick Edit
If you have added a document within a SharePoint library or Document Set and browsed for your file. You will now be prompted to fill in the meta data properties for this document.
For full instructions on how to use the upload or new button refer to manual How to create/upload a document.
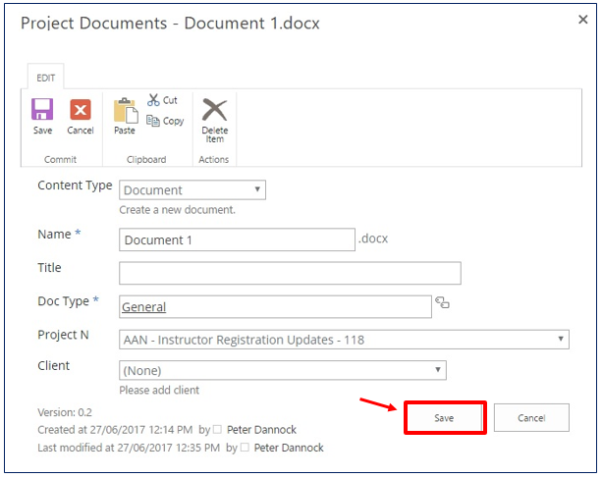
When prompted, fill in the form with the relevant details of the document.
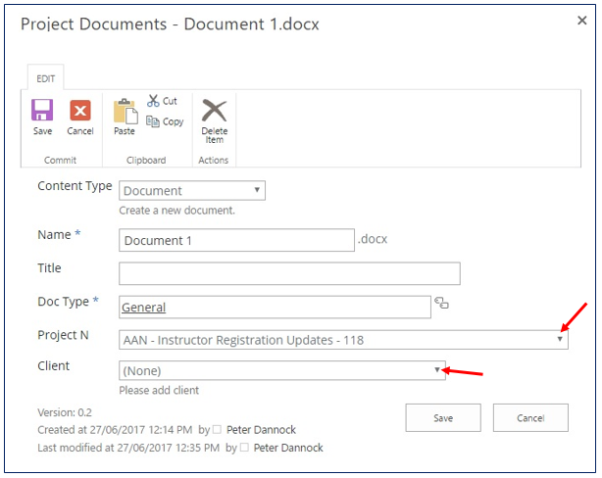
Content Type
If configured, you can select the content type from the Content Type choice field.
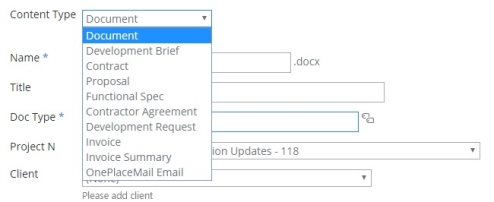
On selecting a different Content Type, the fields displayed may alter.
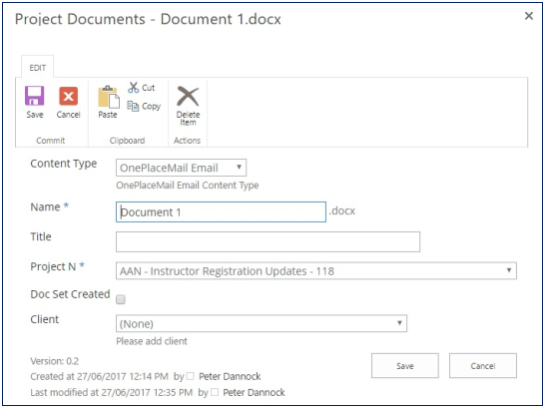
Notes:
- The Content Type field will only appear if Content Types are configured for that library.
Text Field
Free-text fields allow user to enter the required text.

For example, the Name field allows you to enter the name of the document and the Tile field allows you to enter title for document.
Note:
- Fields with a blue asterix next to the field name indicates that a value is required. Ensure you enter a value in this field before saving.

Managed meta data
Managed meta data allows a user to select from a pre-defined set of meta data for the library. Fields with underlying Managed Meta Data can be identified by the icon to the right of the field.

Click on the icon to open the Managed Meta Data dialog.
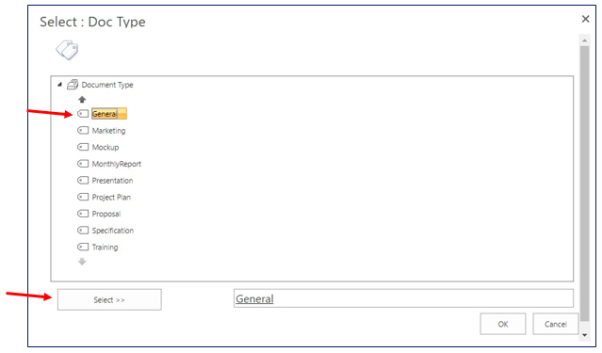
Seletc the required value and clikc the ‘Select’ button to select your required option.
Once your option has been added click OK

Choice Field
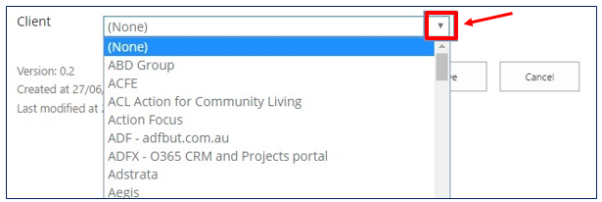
A Choice field allows a user to choose an option from the pre-defined drop-down list. Choice fields are categorised by the small downward arrow to the right of the field.
Once all relevant information is completed, click Save
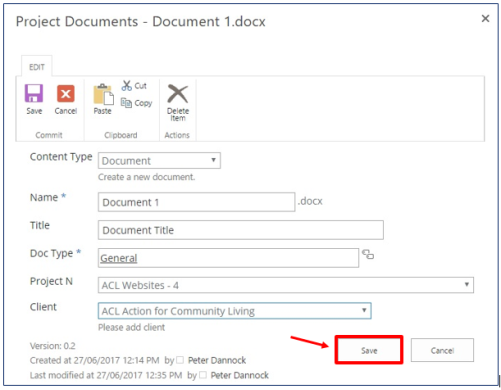
New document uploaded with meta data properties

If you have added a document within a SharePoint library or Document Set and browsed for your file. You will now be prompted to fill in the meta data properties for this document.
For full instructions on how to use the upload or new button refer to manual How to create/upload a document.
It is possible to add meta data directly to the document. To view the document properties, select >File >Info
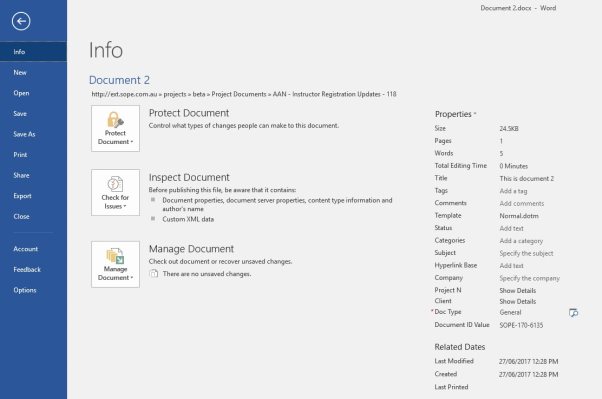
It is possible to update the Meta data properties of the document form this Info panel.
Note that in some cases, a dialog may pop-up to enter the detail, such as a choice field or managed meta data field.
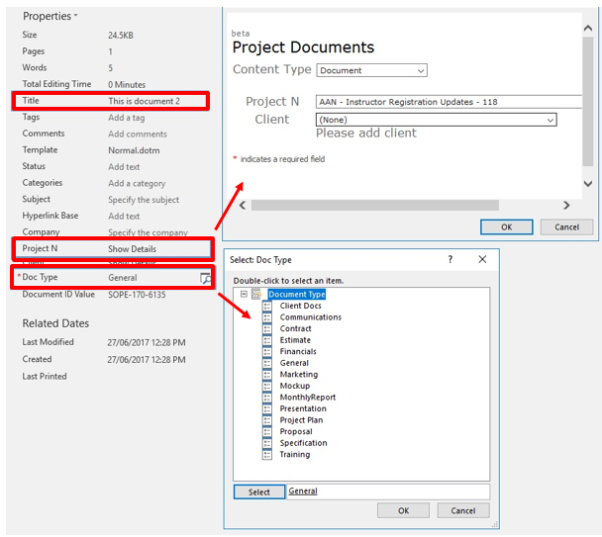
If you have not completed all meta data properties to your uploaded document you can follow one or more of the below options.
Go to your SharePoint library or Document Set. Select the document you wish to add meta data to, click the … menu and navigate to the ‘Edit Properties’ option.

Fill in the requried fields
Click Save to save any changes
When in a document set or within the All Documents view you can use the Quick Edit tool to attach meta data to one or multiple documents.
This view acts like an excel spread sheet
Go to your document library
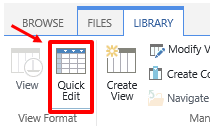
Navigate to the Library tab located in the top LHS of the screen

Click on Quick Edit
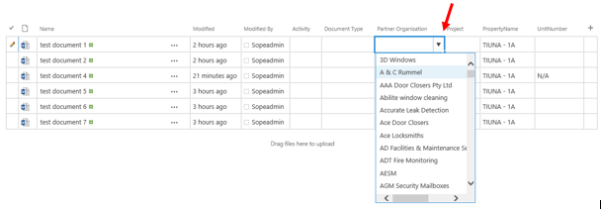
This displays the documents in an excel spreadsheet style view
Here you can type in your meta data, select from the drop downs etc
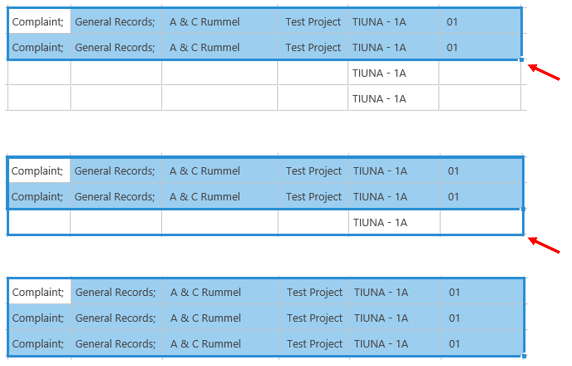
Similar to Microsoft Excel you can highlight cells and use the bottom right hand corner and drag the properties down to the next item
Once you are happy with your changes click on Stop editing this list

Changes have been made
