Description: This procedure provides enough information to create Birthdate and Hiredate as managed properties in sharepoint search schema for the What’s Up webpart.
Current procedure assumes that search service application has been configured and user properties Birthday and Hiredate are populated in the user’s profile
Table of contents:
1.How to create a new/custom Managed Property in Sharepoint Search
2.Run/schedule a full crawl of the search (Onpremise)
3.Request a Full crawl for sharepoint online site (Office 365)
1.1. Navigate to the home page of your site
Ensure you are logged in as a Site Collection Administrator
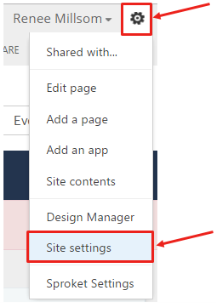
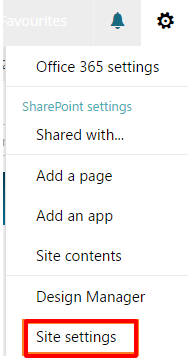
1.2. Click on the ‘Settings Wheel’ and then ‘Site Settings’
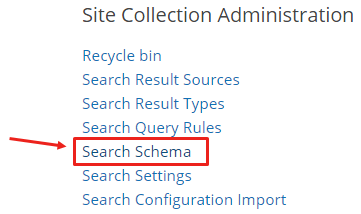
1.3. Click on ‘Search Schema’ under ‘Site Collection Administration’
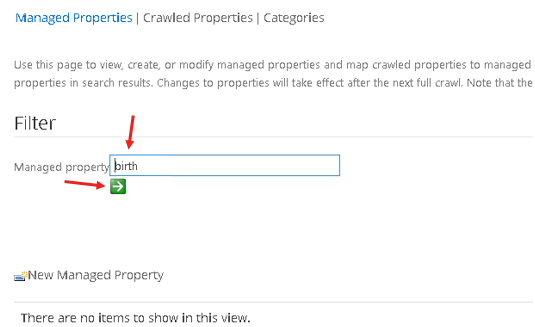
1.4. Verify whether managed property exists
Search for the property and click on the green arrow to ‘apply’ search
1.5. Create new managed Property by clicking ‘New Managed Property’

(a) Give a Name for the Property(here Birthday)
(b) Select Datatype (this will be explained in next section on what to choose)

(c) Select the main characteristics shown below , Allow multiple values is not applicable for birthday and hiredate
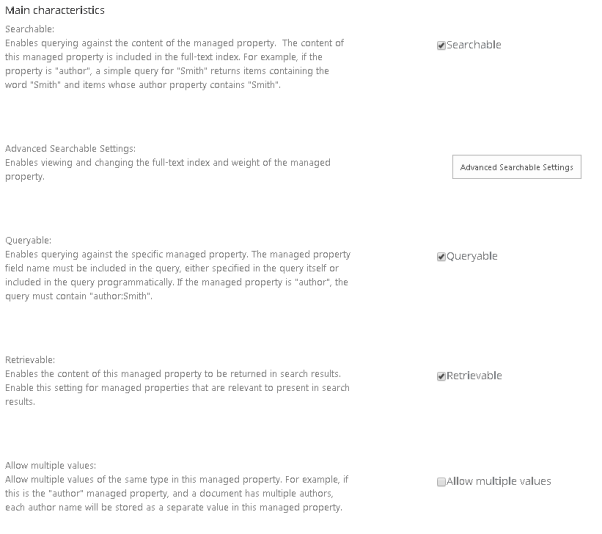
(d) main characteristics (cont..)
Select Safe check box if it is an anonymous site for intranet site , for an intranet site this can left disabled

(e) Mappings to the crawled property
Select Include content from the first crawled property that is not empty.. and click on Add a Mapping
(f) Search for the relevant crawled property
Property | Internal Name |
Birthdate | People:SPS-Birthday |
HireDate | People:SPS-HireDate |
(g) Select the relevant property and click OK
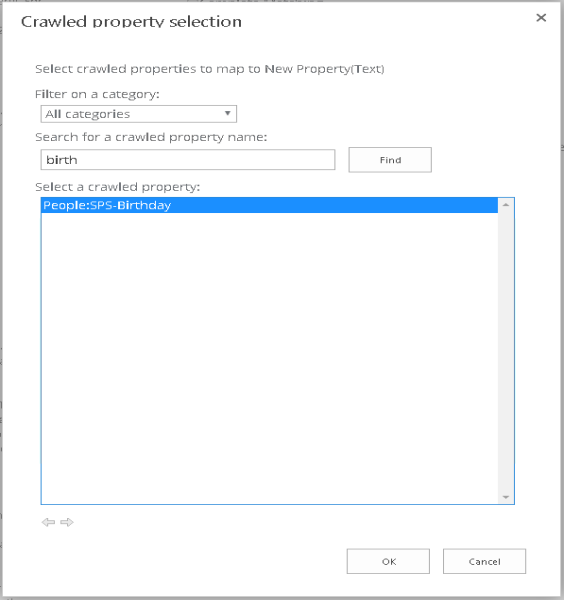
(h) Finally save the property by selecting Ok
(i) Verify whether the properties have been added successfully

(j) Repeat the step 1.5 to add Hiredate and other managed properties
**Please Note Full crawl would consume quite a few resources on sharepoint server and we would recommend running it out of office hours for On premise environment
2.1. Open Sharepoint Server on which Central Administration site is enabled
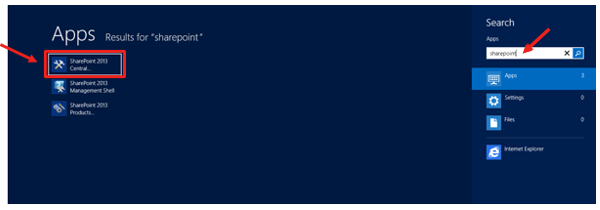
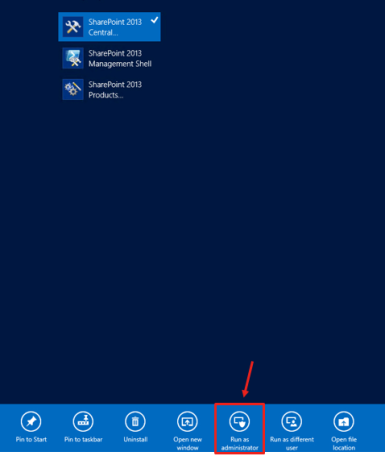
2.2. Open Central Admin by selecting ‘Run as administrator’
2.3. Select ‘Manage service applications’
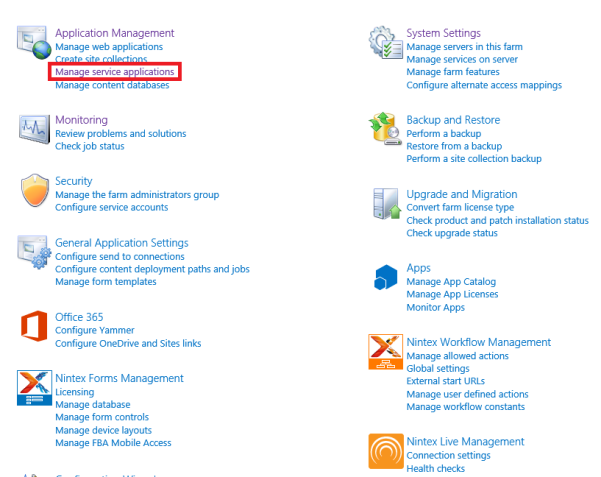
2.4. Check for Search Service Application’
Note: Name can be different and hence check for Type

2.5. Click on the name of ‘Search service application’

2.6. Click on Content Sources on Left hand navigation
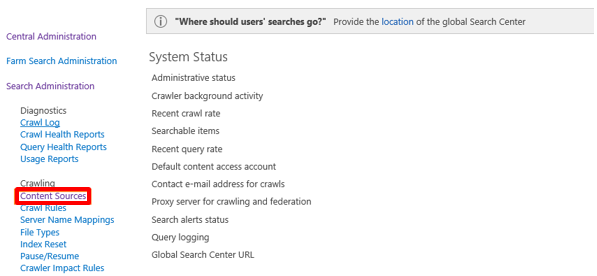
2.7. To schedule a full crawl
Edit the relevant content source (Proper content source should be selected based on the one used in site collection)
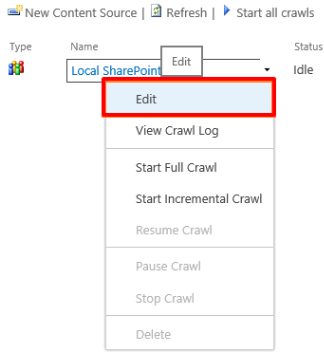
Under the crawl schedules , select Full crawl amd click on Create schedule

Set a schedule to run it at appropriate time
(a) Open sharepoint site as Site collection administrator
(b) Navigate to site settings
(c) Under Search , select Search and offiline availability
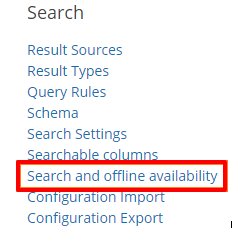
(d) Click on Reindex site and click ok
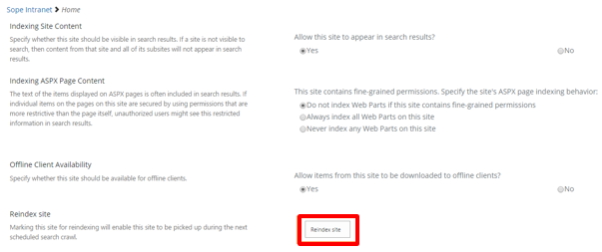
It may take few hours depending on crawl schedule