Overview
Page Builder, is a page layout that comes with your Sproket license. It allows you to customise your page layouts, without the need to custom code for both standard page layouts as well as Knowledge Base layouts. It's best to create and manage these in Chrome.
Capabilities
Page Builder Capabilities
- Available for standard and knowledge base pages
- You have the option to hide the left hand navigation
- Lots of grid options that can be used to segment your webparts and content however you like,
- Ability to add any of the following to sections with your grid:
- Text
- Web Parts
- Panels
- Tabs
- Collapse
Work Instructions
Finding the Page Builder Layouts
When you create a page, you can change the page layout by navigating to Page > Page Layout, in the top ribbon. If Page Builder or KB Page Builder is not available, please contact your SharePoint administrator to make it available.
Getting Started
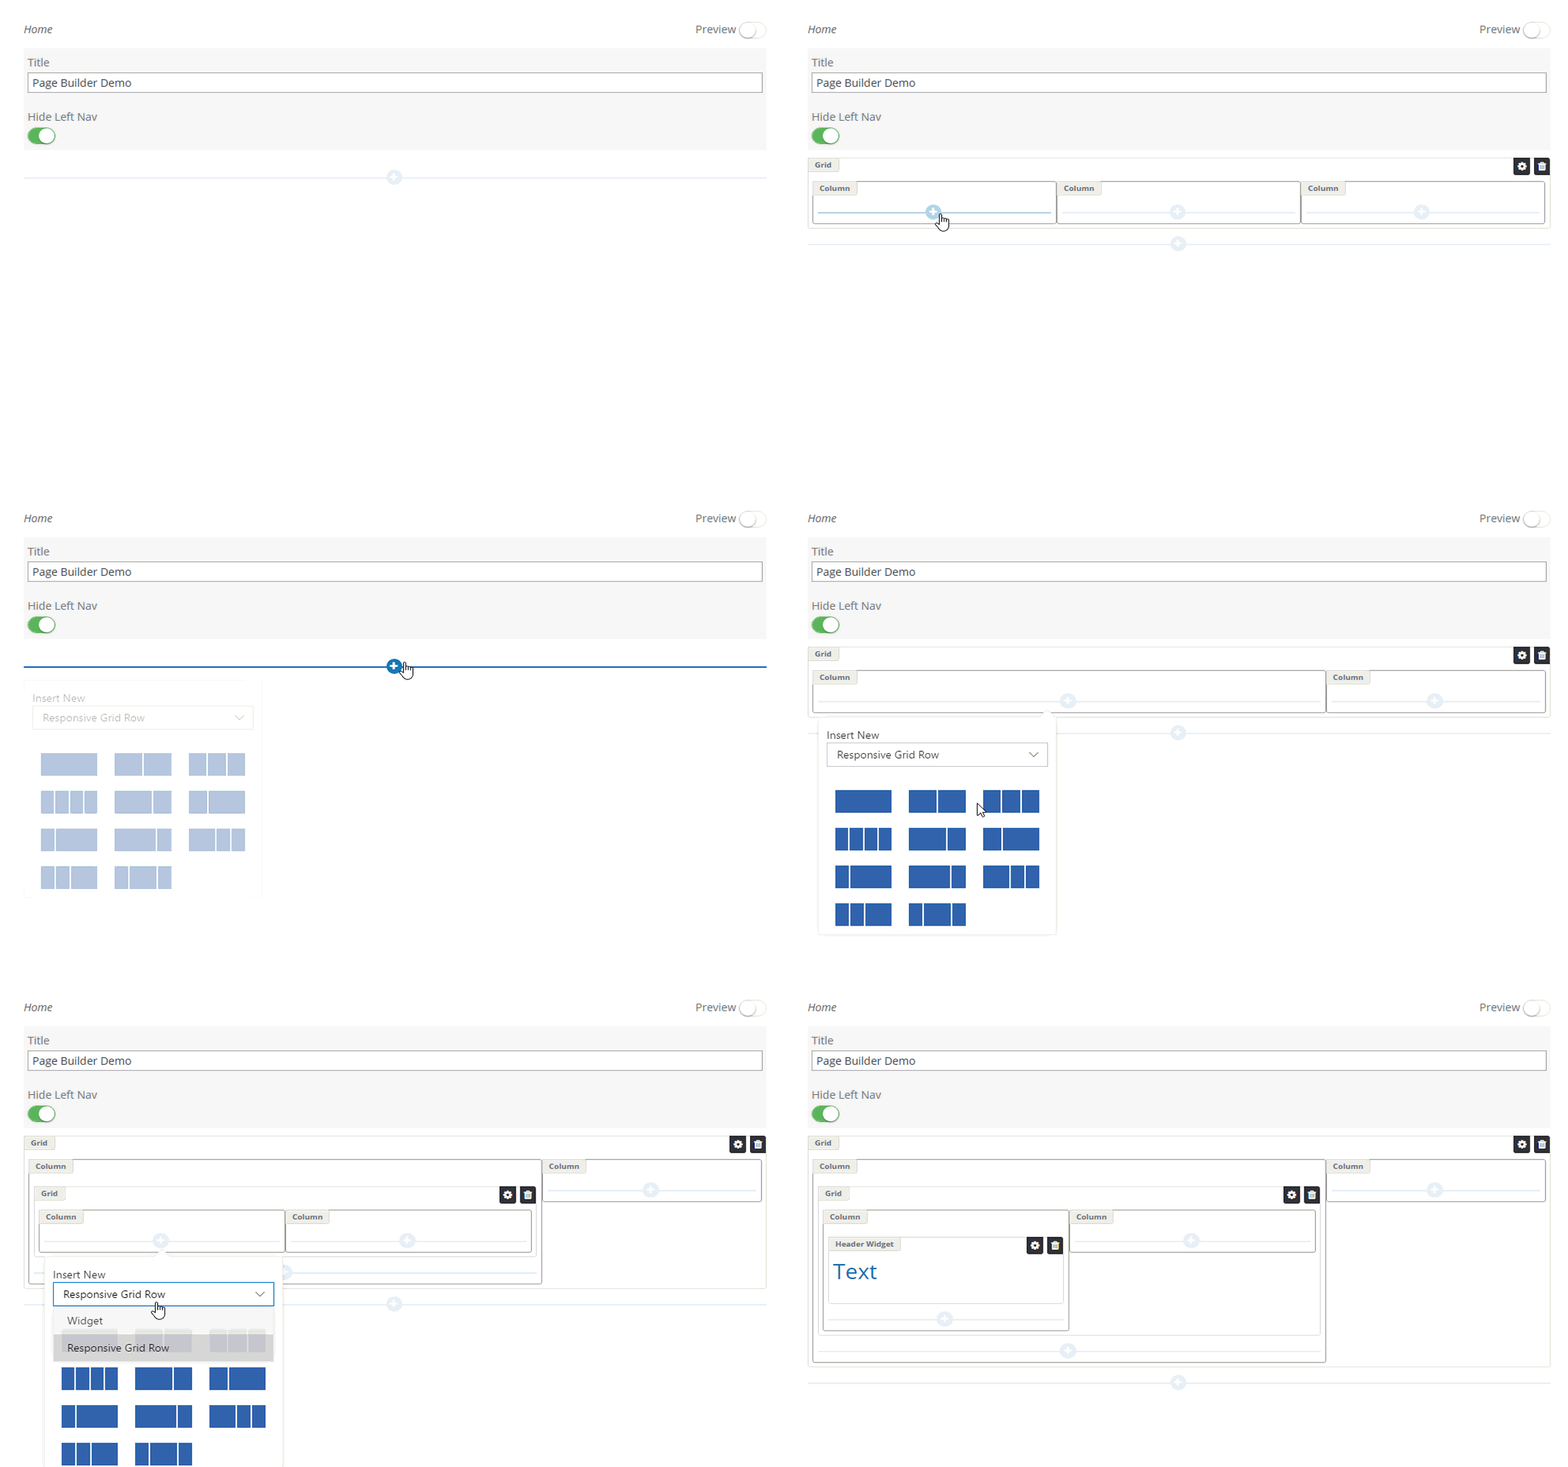
To get started you need to click the plus sign (+) in the middle of the main line. Then choose what you want to add from the following.
You can add grids within grids, and widgets within any grid section.
Grid
Just click on what layout you require. You can have multiple levels of grids. Just click and add as many or as few grids as you need.
In the top right hand side of each Grid is 3 icons to manage each grid individually
- Cog - Settings
-
Cross - Allows you to resposition the grid (When you click it, grey "move here" banners will appear in every avaiable position of the page.
-
Bin - Remove the grid

Widgets
Text
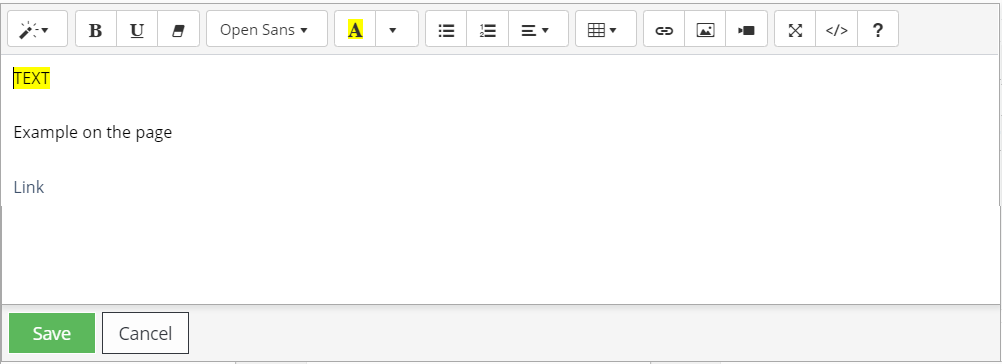
The Text widget allows you to add content anywhere on the page. To add content to this widget, just click into the text widget box and it will launch a window, where you can write content, add images, links and more.N
Please note: If you want to to insert an image,

Web Part
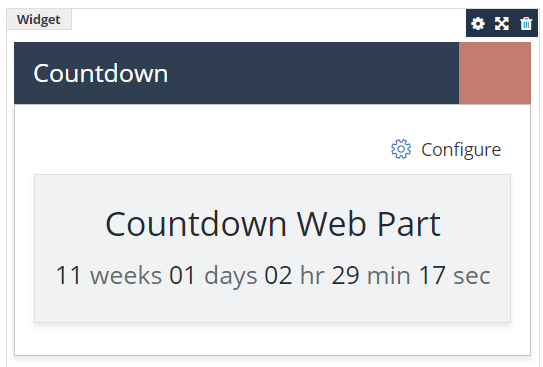
When you add the "Web Part" widget, you will need to click into the Widget box on the screen, then navigation to "Insert" > "Web Part" in the top ribbon. This means you can still utilise all your custom, standard and sproket web parts.
Panels
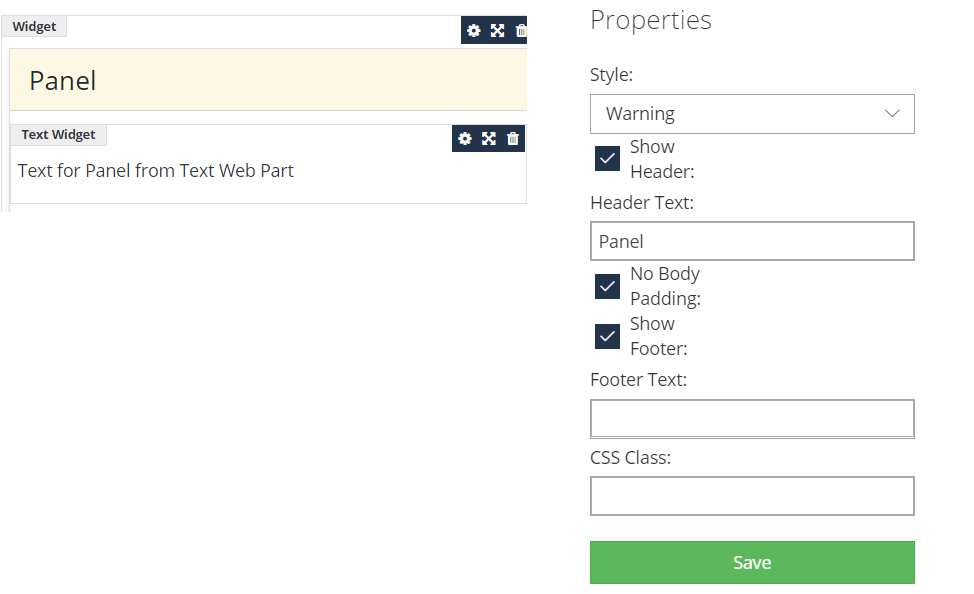
The Panel widget, allows you to add distict headings and sections to your page builder. To configure this, once you have added it to the page, you will need to go into the cog (settings) where you can change the text and choose a predefined style for the Panel.
Tabs
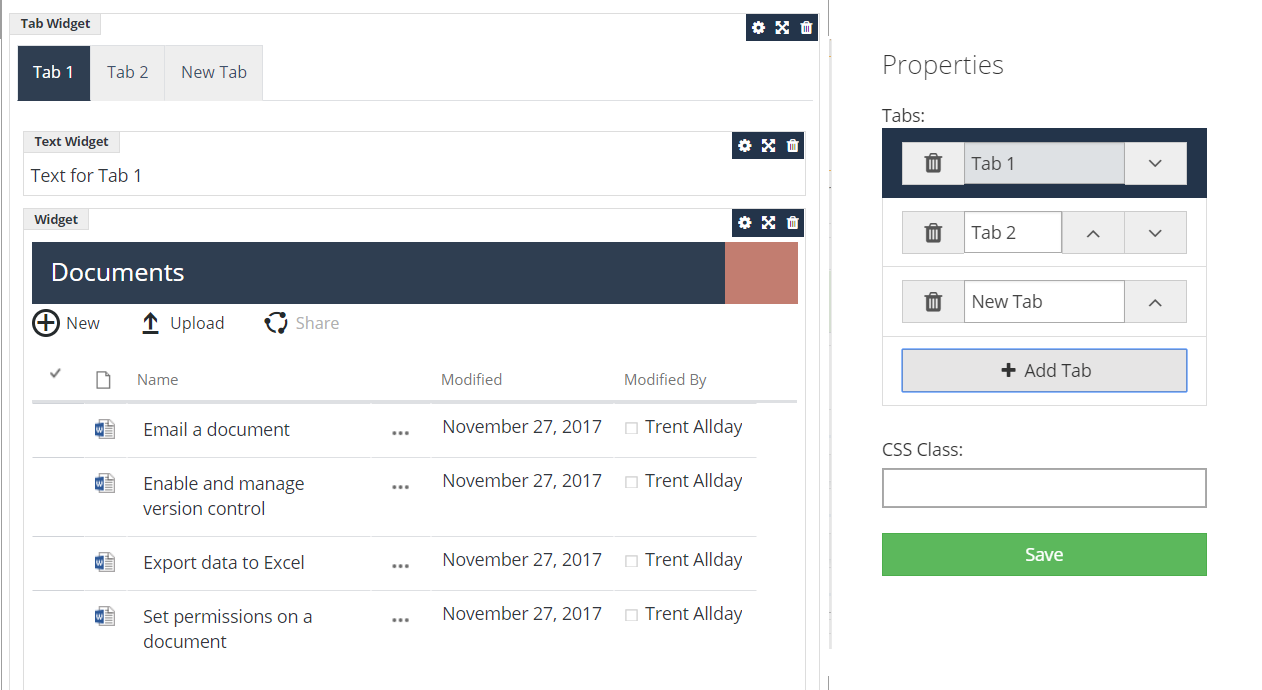
Tabs allows you to add a lot of content to a page without taking up much space. You can add multiple Tabs and then unique content under each Tab.
This could potentially be used for steps in a work instruction, with the relevant documents and content for each step under each tab.
To configure this once you have added it to the page, you will need to go into the Cog (settings) where you can change the title and order of each tab and add new tabs.
Once you have set up the tabs, you can then add another widget to display under each tab (Web Part, Text, etc.)
Collapse
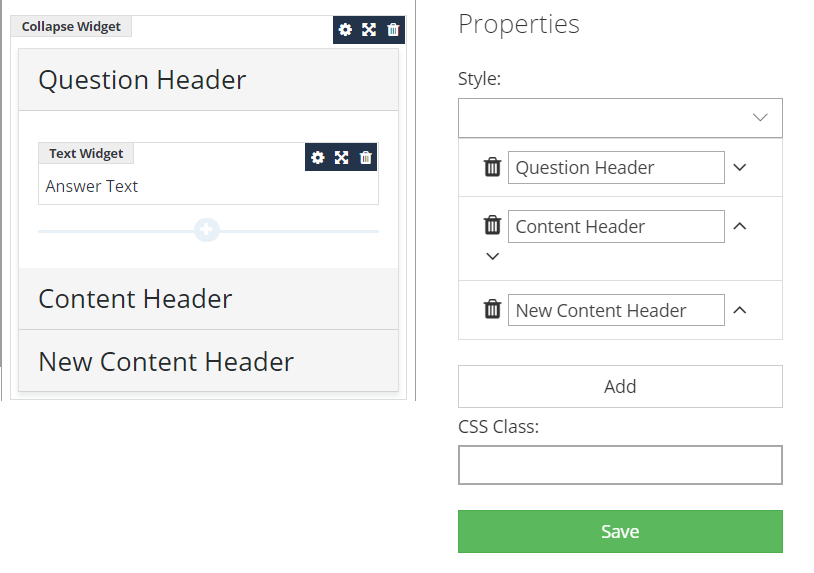
Collapse, also allows you to add a lot of content to a page in a different way. This Widget, be default will show you content collapsed by the content headers. To configure this, once you have added the widget, you click the Cog (settings) then you can change, add or sort your content headers.
To add content underneath these headers, you just need to add content within each section on the page. (You can add widget within these sections)
Collapse widget could potentially be used for an FAQ section on a page.
Limitations / Considerations
You must be in Chrome to be able to use Page Builder.